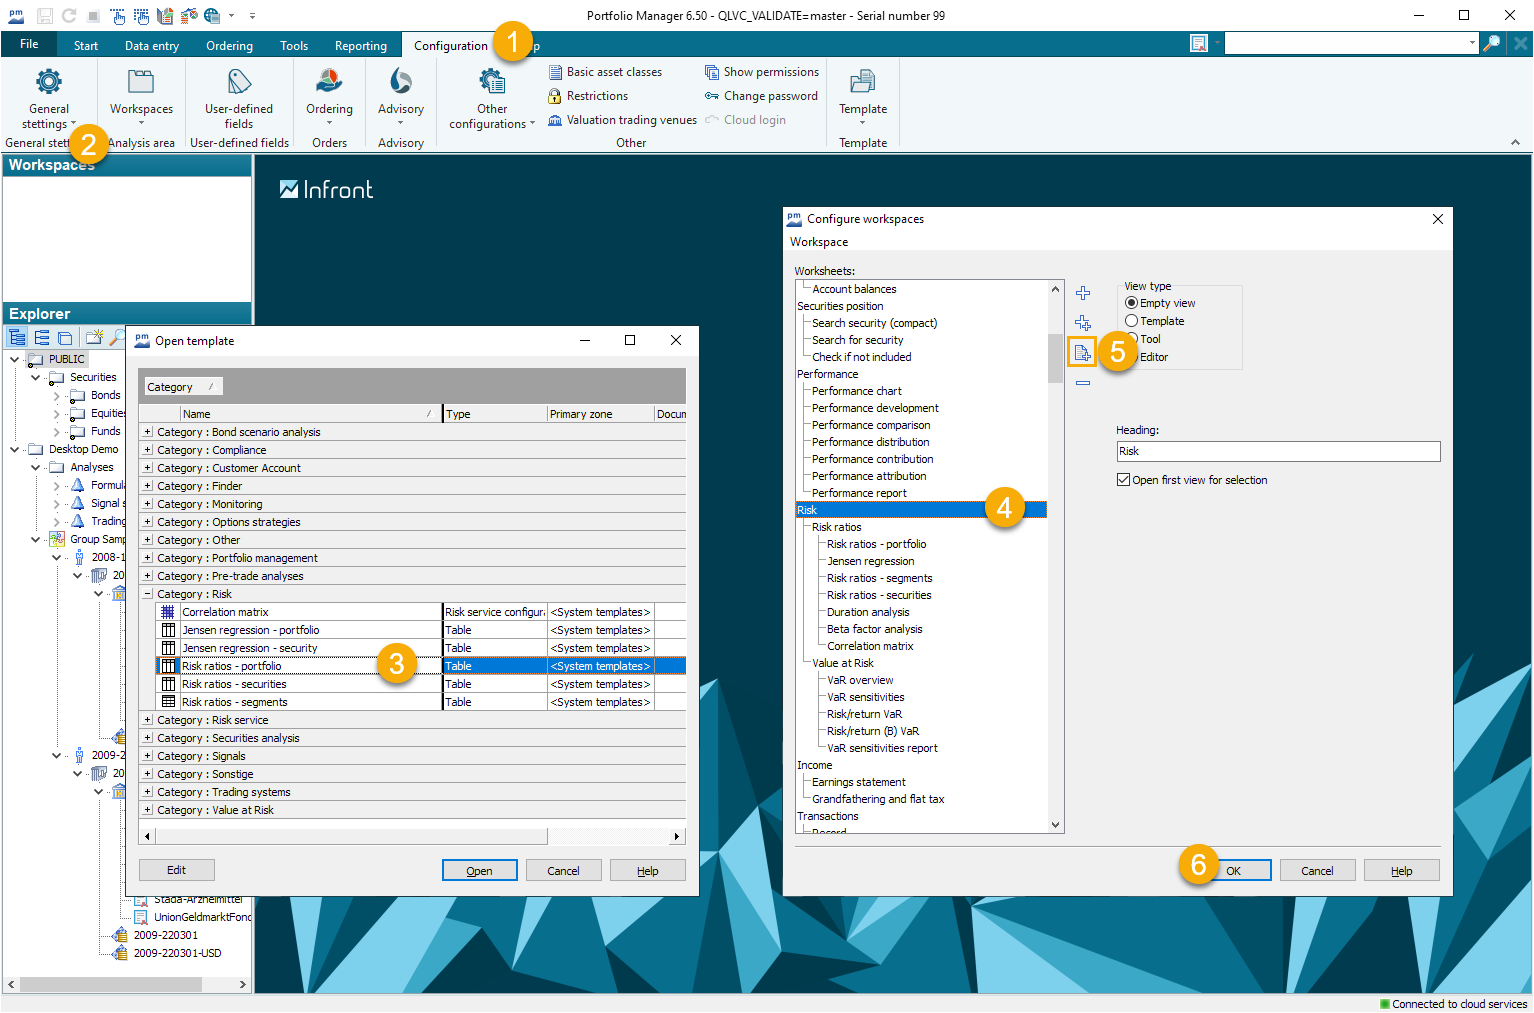
The individual categories, which are displayed as worksheets, are listed on the left-hand side.
The right-hand area can be used to create new worksheets, define templates (evaluations) as worksheets and also remove worksheets (tabs) from the display.
This configuration is only possible if the user has the appropriate authorization via the user administration.
|
Element |
Description |
|---|---|
|
|
Icon "Create new worksheet" Click on this icon to insert a new, higher-level worksheet under a selected entry. |
|
|
Icon "Create new sub-worksheet" Click on this icon to insert a new worksheet - as a sub-item - under the selected category. |
|
|
Add template worksheet" icon This icon takes you directly to the "Open template" dialog box. You can select an evaluation there, which is then inserted at the previously marked position. Multiple selection of templates is also possible. To do this, hold down the <CTRL> key when selecting in the "Open template" dialog box. |
|
Unknown Attachment |
Delete selected worksheet" icon Click on this icon to delete the previously selected entry from the list. The deletion of an entry cannot be undone.
|
|
Heading |
Enter a name for the worksheet. When selecting an evaluation, the name of the template is already entered, but can still be changed here. |
|
View type |
Select the type for the new worksheet to be defined here. Depending on the selection, the options in the area below change.
|
|
Range |
Only visible for certain templates. You do not need input objects for some templates, e.g. for the various finders. The following areas are available so that these templates can also have a fixed place in workspace configurations:
This setting is already preset for affected standard evaluations, so you should only make changes here in exceptional cases. |
|
Available for |
Not for "Blank view" option. The categories in whose workspaces the selected template should appear are ticked in this field. The appropriate selection is already activated. You can change the selection of categories with a mouse click if necessary. |
|
Individual objects |
If this checkbox is activated, individual objects are permitted as input objects. A single security as an input object for a chart template. This setting is already preset for the standard evaluations, so you should only make changes here in exceptional cases. |
|
Lists and folders |
If this checkbox is activated, entire lists of objects or folders containing such objects are permitted as input objects. You open a securities list for several securities via a clipboard or via the context menu. This setting is already preset for the standard evaluations, so you should only make changes here in exceptional cases. |
You can move the worksheets to a different position using drag & drop.