When planning your various tasks, make sure that you define different execution times. Tasks scheduled at the same time can be saved but not executed via time control. In these cases, only the "first" task is executed.
Proceed as follows to activate the time control:
-
In the Windows start menu, select the command <Zeitsteuerung einrichten>.
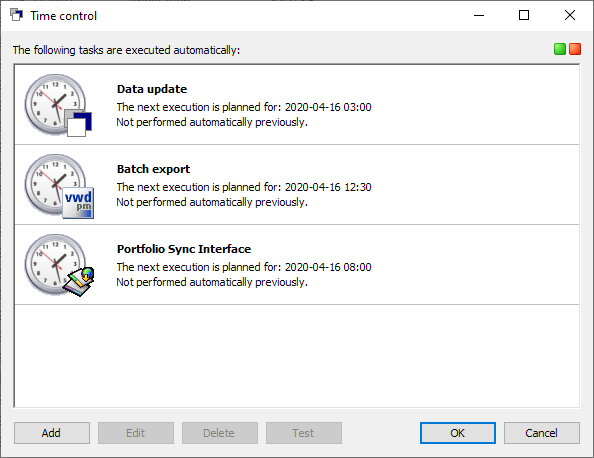
The "Time control" dialog box appears.
-
Select the "Add" button here to add a time-controlled task.
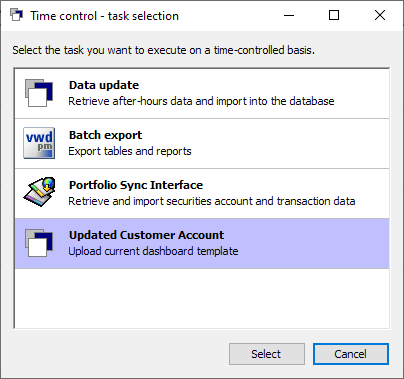
The next dialog window for time control appears.
-
Select the task to be executed via time control, e.g. a data update, by highlighting it and then clicking the "Select" button.
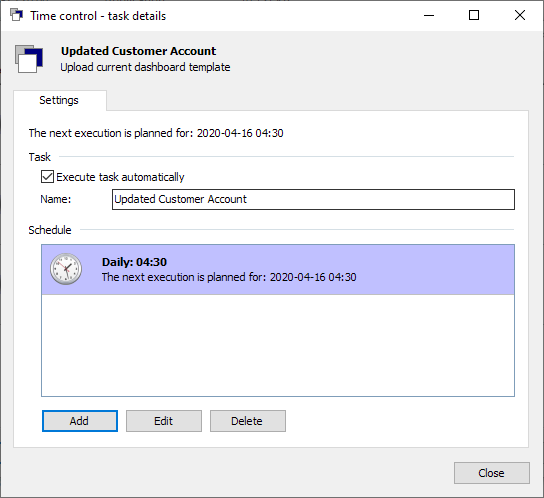
The "Time control - Task details" dialog box now appears, in which you can make the detailed settings for the task.
-
Select the "Add" button here too to add a new task.
-
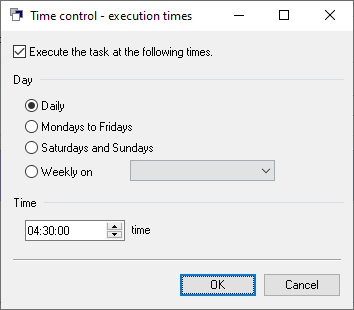
Enter the exact times for the execution of the task in the time control dialog box that now appears. The "Execute the task at the following times" checkbox gives you the option of "suspending" this task at the times set here without deleting the execution times. Only deactivate the checkbox in this case.
-
Confirm the execution times with "OK".
-
You will now return to the previous dialog box where you can see the schedule on the "Settings" tab and assign a name for the task in the "Name" input field. The "Execute task automatically" checkbox is activated. By deactivating it later, you can leave the entire task, including the schedule, "dormant" and reactivate it at any time.
-
Exit this dialog box with "Close" and end the time control with the "OK" button.