Portfolio Service Batch Export Tables" module
Proceed as follows to start a mail merge:
-
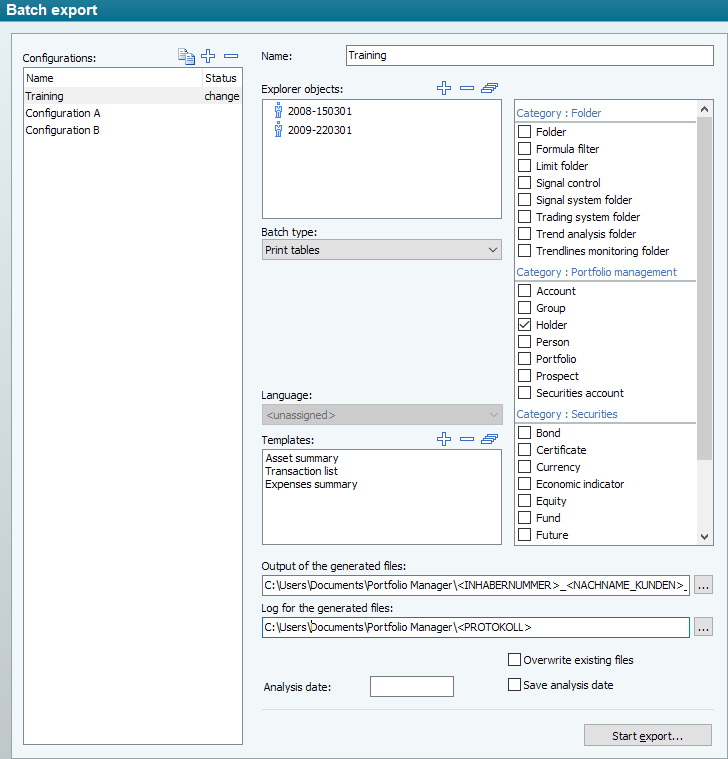
Select the "Batch export" icon on the "Reporting" tab.
The "Batch export" worksheet opens in the evaluation area. -
Add your batch export configurations in the left-hand area of the dialog window or select the ones you want to edit.
-
Enter a name for the configuration in the "Name" input field. This step is of course only necessary when configuring new batch export configurations.
-
Then use the selection list to select the "Print tables" batch type.
-
Select the desired tables in the "Templates" area.
-
Select the objects for which a configuration is to be available on the right-hand side of the dialog box. To do this, activate the checkboxes for the objects.
-
Save the configuration (and all other changed configurations) using the FILE, SAVE command, the "Save" icon in the quick access toolbar or the key combination <CTRL>+<S>.
-
You can now start the mail merge manually using the "Start export..." button.
-
In the "Print" dialog box that appears, you have the option of selecting and setting up your printer for mail merge. The settings for printing tables are adopted here. If individual print settings have been configured for the selected templates, these will take effect.
-
Select the "OK" button in the "Print" dialog box.
The tables are printed. A message window informs you of the result of the print job.